Bu programı nasıl kurabilirim.
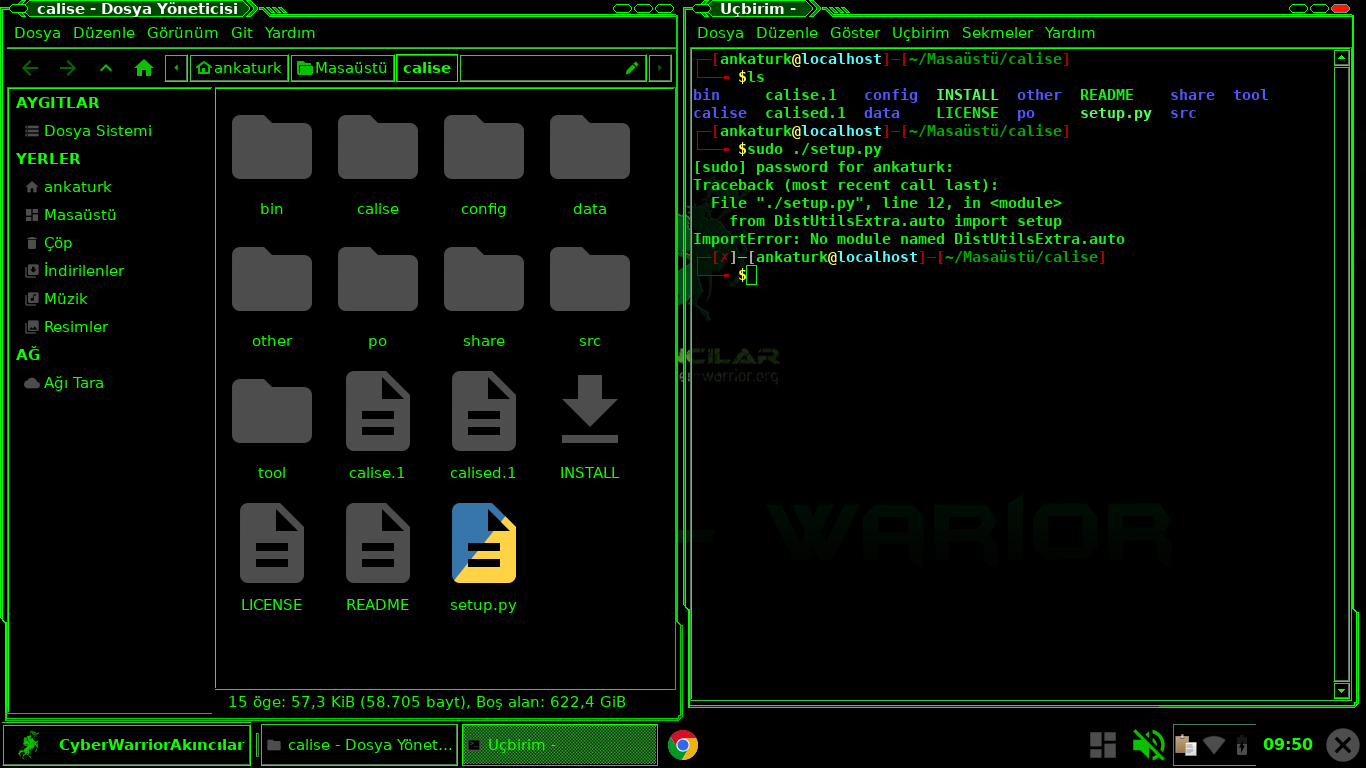
python setup.py
veya
python3 setup.py
komutunu deneyin
İkisinden biriyle *.py uzantısını çalıştırabilirsiniz.
2 Beğeni


sudo apt install python-distutils-extra istenilen modulu yükleyin.
1 Beğeni
 !
!
Olmadı.
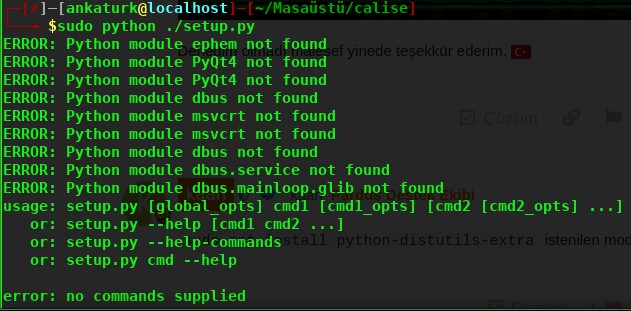
Yine olmadı.
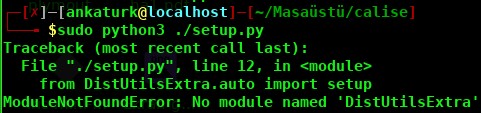
Ve yine olmadı.
Readme dosyasını okuyunuz. Yapmanız gerekler yazılmış olması gerekiyor.
1 Beğeni
Calise (beta)
Özet
Calise (acronym for Camera Light Sensor) is a lightweight program that uses any v4l2 compatible camera as a light sensor: obtains ambient brightness and calculates correct backlight setting according to a user-defined scale.
For simple usage instructions type “calise --help” or “calised --help” and for a detailed explanation please refer to man page.
Copyright (C) 2011-2012 Nicolo’ Barbon
Calise is free software: you can redistribute it and/or modify it under the terms of the GNU General Public License as published by the Free Software Foundation, either version 3 of the License, or any later version.
Calise is distributed in the hope that it will be useful, but WITHOUT ANY WARRANTY; without even the implied warranty of MERCHANTABILITY or FITNESS FOR A PARTICULAR PURPOSE. See the GNU General Public License for more details.
You should have received a copy of the GNU General Public License along with Calise. If not, see http://www.gnu.org/licenses/.
What’s calise?
Calise is a program written in python (with 2 C-python modules) that reads frames from a camera, computes ambient brightness value and sets backlight accordingly.
Main program (executable filename “calise”) grabs the camera for the whole execution and grantes really high fidelity computations, BUT should not be used in background - like a daemon for example - because, despite cpu time usage is low ~1%, it causes too much wakeups.
On the other hand from release 0.1.0 there’s also a “service” version (executable “calised”) that, with the help of dawn/sunset times and weather informations optimizes captures as described below (and of course service’s cpu time usage and power consumption are actually negligible):
dawn/sunset: more or less from 1 to 7 captures per minute (according to latitude)
daytime: from 60 to 12 captures per hour (according to weather informations taken once per hour, if no internet or weather info disaled 20)
night: no captures
Anyway “service” version has also the capability of “manual” captures if the value returned by automatic execution is not good enough.
Take a look to man pages of both programs to get further informations.
Also, a really detailed wiki on calise installation, configuration and execution is up on calise site:
Calise
Setup Instructions and dependencies:
Please refer to INSTALL file from this same directory
Notes:
On the first run the program will start calibration to compile the default profile (so for that first time you have to run on terminal), then you can add other profiles giving the switch --calibrate to the program.
There has to be at least one “default” profile in the config dir, if not, the program will calibrate to get one.
To use a custom profile (not default), give the --profile switch to the program.
Once a profile is created, you can modify it adding (but not removing) options. Take a look at config/sample.conf for all available options, btw the ones provided through calibration should suffice
Translations:
Currently there is only (partial) italian translation, but anyone is encouraged to make his/her own language translation.
“Service” version is currently not translated at all.
INSTALL dosyası
Özet
Calise setup instructions
NOTE: This is a brief installation guide, for a complete and more readable
version of install instructions take a look at wiki page “Installation”
on calise site:
Installation - Calise
Generic Installation
NOTE: for differences in distro-specific installation refer below
Get these needed python2 modules:
dbus
gobject2
xdg
ephem: PyEphem Home Page — PyEphem home page
Plus, these for building/installing (you can safely remove them after you
completed calise installation):
python distutils
python distutils-extra: http://www.glatzor.de/projects/python-distutils-extra/
gcc & everything needed to build C programs
libx11 developement libraries
python developement libraries
kernel headers
intltool
If you want to use the gui of non-daemon version you also need:
PyQt4: Riverbank Computing | Download
Now you’re ready for building/installing the program, move to the folder
where you extracted calise and run:
$ env python2 setup.py build
# env python2 setup.py install --prefix=/usr
Then refresh icon-cache:
# gtk-update-icon-cache -q -t -f /usr/share/icons/hicolor
Start calise calibration (in Terminal):
$ calise --calibrate
NOTE: before you proceed with calibration-step 3, you have to give write
      permissions to the file returned by step 2 (sysfs backlight path):
        $ interface= #type here the file returned on calibration-step 2 (eg. /sys/class/backlight/acpi_video0/brightness)
        # chmod 666 $interface

      After that you can continue calibration.
The permission change just applied will reset on reboot since it’s managed
by udev. In order to make “permanent” changes you have to add a udev rule.
However it’s not good to set permanent write permission also for “guest”,
to avoid that you can set write permission for video group users (or the
group you think swits better)
Here’s how to achieve that (in most distributions, check for udev’s rules.d
directory position, can also be “/lib/udev/rules.d” or others):
# must be run as root
for path in /sys/class/backlight/*
do
  interfaces="`udevadm info -a -p ${path} |
    grep "KERNEL=" |
    sed s'/KERNEL==//' |
    awk -F ['"'] '{print $2}'` ${interfaces}"
done
for interface in $interfaces
do
  udevrule="$pkgdir/lib/udev/rules.d/99-backlight-$interface.rules"
  echo "KERNEL==\"${interface}\", RUN+=\"/bin/chmod 664 /sys/class/backlight/$interface/brightness\"" > $udevrule
  echo "KERNEL==\"${interface}\", RUN+=\"/bin/chgrp video /sys/class/backlight/$interface/brightness\"" >> $udevrule
done

NOTE: As said before, you have to be member of the video group or that
      won't work (of course you can choose the group you prefer)
      If you chose a group different from video, you'll have to edit
      the file other/org.calise.conf (or directly
      /etc/dbus-1/system.d/org.calise.conf if already installed) and
      replace (line 26) like this:
      -    <policy group="video">
      +    <policy group="thegroupyouchose">
Now you have (hopefully) correctly installed and first configured calise.
To see what you can do now you may take a look at man pages (suggested):
$ man calise
$ man calised
and/or cli help options:
$ calise --help
$ calised --help
Ubuntu (tested on 11.04, 11.10 and 12.04 but also previous should work fine)
You have to prepare the system so, first enable community repository (for
pygame) then run:
# apt-get install python-setuptools python-distutils-extra python-xdg build-essential python-dev libx11-dev python-pip python-dbus linux-headers-uname -r
# pip install pyephem
Plus, if you want the gui:
# apt-get install python-qt4
Move to the folder where you extracted calise and run:
$ env python setup.py build
# env python setup.py install --install-layout=deb
Remaining passages should be the same as generic installation
OpenSuse 12.1 (and probabily also previous)
Refer to Generic installation.
NOTE: To un correctly the calibration you need to symlink the program
/sbin/udevadm to /usr/sbin, it should be completely safe (and if you
think is not, after calibration you can remove the symlink):
# ln -s /sbin/udevadm /usr/sbin/udevadm
Yüklemeniz gereken paketler ve adresler ve nasıl yüklenilecekleri belirtilmiştir. Makaleye uygun olarak kurulum yapabilirsiniz.
2 Beğeni
Bu konu son cevaptan 10 gün sonra otomatik olarak kapatıldı. Yeni cevap girilmesine izin verilmiyor.

